

1. Take the screenshots
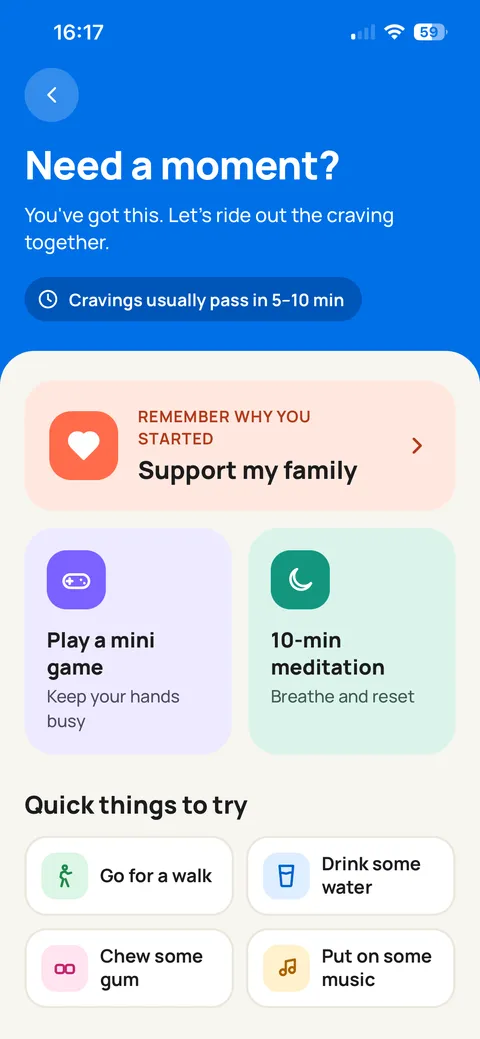
Run your app from Xcode on an iPhone simulator, open the screen you want and press ⌘S. Simulator saves a PNG to your desktop at the device’s full resolution, so it stays sharp when you put it in a design.
Before you start, fill the app with realistic data: a to-do app with three tasks in it looks better than an empty list. Pick screens that show different features, and keep the same theme and status bar in all of them. Five or six is a good number.
If you redo the same screens for several devices or languages, Fastlane snapshot can take them for you through UI tests.
2. Write a headline for each
Most people only look at the first two or three screenshots in search, and they read the headline before the screen. Say what the person gets, not the name of the feature: “Get through a craving” works better than “Craving tools” for an app that helps you quit smoking.
Use each screenshot for a different thing. One shows how you start, one how you use the main feature, one where you see your progress. Keep the headlines short enough to read at phone size, three to six words is usually enough. There’s more on this in how to choose and order your screenshots.
3. Design the set
The usual layout is simple: a background color, the headline at the top and the screenshot below, often inside a phone frame. Keep the font, the margins and the frame the same on every screenshot, so the set looks like one piece when someone swipes through it.
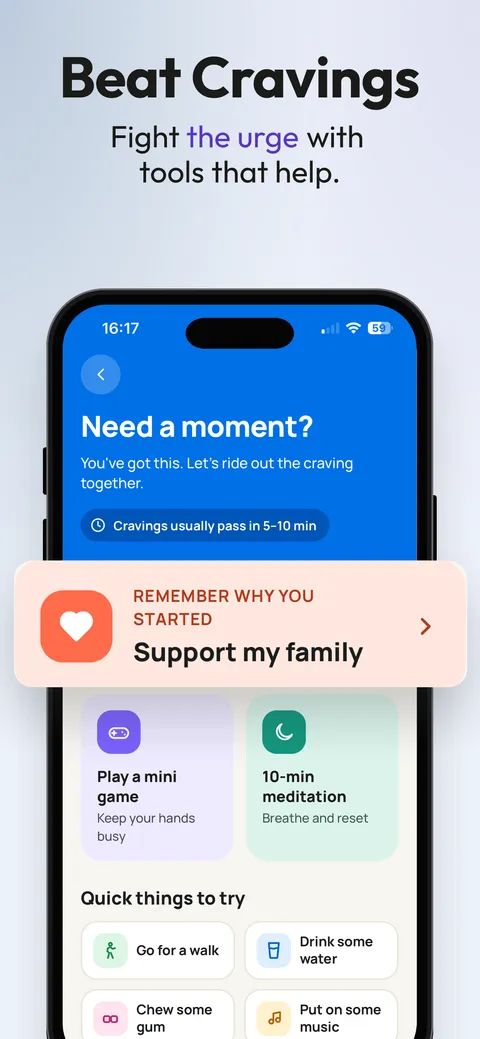
You can build this in Figma or Canva with a frame at the exact export size, then duplicate it for each screen. Or upload your captures to the App Store screenshot generator: it writes the headlines, applies a layout to the whole set and exports every size at once. The preview is free; clean downloads are paid. If you want a free export, see the free screenshot tools.
4. Export the right sizes
For iPhone, Apple asks for the medium Dynamic Island display. In portrait that’s 1206 × 2622 px. A 6.9-inch set at 1320 × 2868 px is optional, and App Store Connect can scale your screenshots down for the smaller iPhones. If your app runs on iPad, you also need a 13-inch iPad set, for example 2064 × 2752 px, made from real iPad screenshots.
Export as PNG or JPEG, with no transparency. Minimalist Screens exports the three iPhone sizes; iPad screenshots you prepare separately. The screenshot size guide has every accepted size, landscape included.
5. Check them before uploading
Open each file at 100% zoom and look for blurry captures, headlines cut off at the edge and uneven margins. The screenshot size checker tells you if the dimensions and format are right.
Then shrink the first three to about the size they have in App Store search. If you can’t read the headline, make it shorter or bigger. Leave enough of the app visible: Apple’s guidelines ask that screenshots show the app in use.
6. Upload to App Store Connect
Open your app’s version page and pick the language. Drag in up to ten screenshots for each device size, put them in order and save. Media Manager shows how they look on the other sizes, and lets you add different files for a device or a language.
If a file is rejected, it’s almost always the size or the transparency. Check the dimensions against the slot, and remember that a PNG can look opaque and still have an alpha channel: export it again with a solid background, or as JPEG.
For the full workflow, see how to upload screenshots in App Store Connect.